The Best Way to Harvest Pumpkins
Pumpkins are a beloved crop, especially around fall when they feature prominently in everything from Halloween decorations to Thanksgiving pies. Growing pumpkins can be a rewarding experience for gardeners, but knowing when and how to harvest them is essential to ensure you get the best quality produce. In this guide, we’ll walk you through everything you need to know about harvesting pumpkins—from the best time to pick them, to proper techniques and storage methods. Let’s get started on your journey to harvesting the perfect pumpkin!
Understanding Pumpkin Growth Stages
Before diving into the details of harvesting, it’s important to understand the growth stages of a pumpkin. Knowing what to expect at each stage will help you recognize when your pumpkins are ready to harvest.
- Seedling Stage: After planting the seeds, small seedlings will emerge in 7 to 10 days. These seedlings will grow into long, sprawling vines.
- Vegetative Growth: During this stage, the pumpkin plant develops leaves, vines, and flowers. The plant will focus on absorbing nutrients and growing larger.
- Flowering: Pumpkin plants produce both male and female flowers. Pollination occurs when insects, such as bees, transfer pollen from the male to the female flowers.
- Fruit Development: Once the female flowers are pollinated, small pumpkins begin to form. These will grow rapidly over the next several weeks.
- Maturity: The final stage is when the pumpkin reaches full size and ripens, turning its characteristic orange or yellow color.
Knowing When to Harvest Pumpkins
One of the most critical steps in harvesting pumpkins is knowing when they are ready to be picked. Harvesting too early can result in pumpkins that are underdeveloped or not fully ripened, while waiting too long can lead to pumpkins that are overripe or damaged.
Key Signs That Pumpkins Are Ready for Harvest:
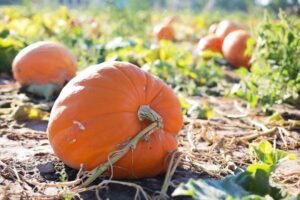
Color: A fully ripe pumpkin will have a deep, uniform color. Most pumpkins will turn a bright orange, but some varieties may be white, green, or yellow. Check your pumpkin variety to know the expected color at maturity.
Hardened Skin: A ripe pumpkin will have a tough, hard skin. You can perform a simple test by pressing your fingernail into the skin. If the skin resists puncture, the pumpkin is ready to harvest.
Vine Condition: The vine connected to the pumpkin will start to wither, dry out, and turn brown as the pumpkin reaches maturity. This is a good indication that the fruit is ready to be picked.
Hollow Sound: When you tap the pumpkin, it should produce a hollow sound. This is a classic sign that the pumpkin is mature and the interior flesh has developed properly.
Days to Maturity: Check the seed packet or plant label to find out the estimated days to maturity for your pumpkin variety. Most pumpkins take between 90 and 120 days to reach maturity after planting.
The Best Time of Day to Harvest Pumpkins
The timing of your harvest can have a significant impact on the quality and longevity of your pumpkins. It’s best to harvest pumpkins on a dry, sunny day. If possible, avoid harvesting pumpkins when the vines and fruit are wet, as moisture can encourage mold growth and rot. The morning or late afternoon, when temperatures are cooler, is an ideal time for harvesting.
How to Properly Harvest Pumpkins
Once you’ve determined that your pumpkins are ripe and ready to harvest, it’s time to pick them. Here are the steps to follow for a successful pumpkin harvest:
Step 1: Gather Your Tools
To harvest pumpkins, you’ll need a few basic tools:
- Sharp Pruning Shears or Knife: A sharp tool will make a clean cut and prevent damage to the stem or fruit.
- Gloves: Pumpkin vines can be prickly, so wearing gloves can protect your hands from scratches.
- Basket or Wheelbarrow: If you’re harvesting several pumpkins, a basket or wheelbarrow will help you transport them easily.
Step 2: Cut the Pumpkin from the Vine
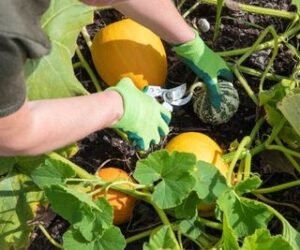
Using your pruning shears or knife, cut the pumpkin from the vine. Make sure to leave at least 3 to 6 inches of stem attached to the pumpkin. The stem is crucial for preventing rot, as pumpkins without stems tend to spoil more quickly.
Tip: Avoid carrying pumpkins by the stem, as it can easily break off. Handle pumpkins from the bottom or sides instead.
Step 3: Handle with Care
Pumpkins are surprisingly delicate, and rough handling can lead to bruising or cracking. Always carry pumpkins with care, and avoid dropping or tossing them.
Step 4: Remove Any Dirt or Debris
Gently brush off any dirt, mud, or debris from the pumpkin. You can use a soft cloth or towel to wipe the surface clean. Avoid using water to wash pumpkins immediately after harvest, as moisture can promote decay.
Curing Pumpkins for Long-Term Storage
After harvesting your pumpkins, it’s essential to cure them properly to ensure they last throughout the fall and winter months. Curing helps toughen the skin and extends the shelf life of the fruit.
How to Cure Pumpkins:
Place in a Warm, Dry Location: After harvesting, place your pumpkins in a warm, dry area for 10 to 14 days. The ideal temperature for curing is between 80°F and 85°F (26°C to 29°C). This process allows the skin to harden and helps heal any minor cuts or blemishes.
Rotate Pumpkins Occasionally: To ensure even curing, rotate your pumpkins every few days. This prevents any one spot from becoming overly soft or rotting.
Check for Mold: During the curing process, keep an eye on your pumpkins for signs of mold or decay. If you notice any mold forming, remove the affected pumpkins from the group to prevent it from spreading.
Once cured, pumpkins can be stored for several months in a cool, dark location. The ideal storage temperature is around 50°F to 55°F (10°C to 13°C). With proper curing and storage, your pumpkins can last until spring.
Common Pumpkin Harvesting Mistakes to Avoid
Even experienced gardeners can make mistakes when it comes to harvesting pumpkins. Here are some common pitfalls to avoid:
Harvesting Too Early: Pumpkins need time to fully ripen on the vine. If you pick them too early, they won’t develop the rich flavor and vibrant color associated with ripe pumpkins. Be patient, and wait until all signs of maturity are present.
Breaking the Stem: The stem acts as a natural barrier against rot and decay. If the stem breaks off during harvest, the pumpkin will spoil more quickly. Always handle pumpkins gently, and avoid carrying them by the stem.
Overhandling the Fruit: Pumpkins bruise easily, and excessive handling can damage the skin. Handle pumpkins as little as possible, and store them in a single layer to prevent pressure points.
Leaving Pumpkins in the Field Too Long: While pumpkins can tolerate light frost, a hard freeze can cause significant damage to the fruit. It’s important to harvest pumpkins before the first heavy frost to prevent them from freezing on the vine.
How to Use Harvested Pumpkins
Now that you’ve successfully harvested your pumpkins, what can you do with them? Pumpkins are incredibly versatile and can be used for both decorative and culinary purposes.
1. Decorative Use
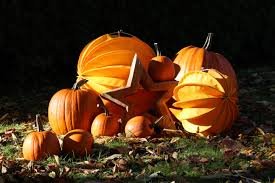
Pumpkins are a classic fall decoration, often used for carving jack-o’-lanterns, creating centerpieces, or adorning porches. Smaller varieties like pie pumpkins and miniature pumpkins are perfect for tabletop displays or wreaths.
2. Culinary Use
Pumpkins are delicious and nutritious, making them a staple ingredient in many fall recipes. Here are some popular ways to use your harvested pumpkins in the kitchen:
- Pumpkin Pie: A fall favorite, pumpkin pie is a sweet, spiced dessert made from pureed pumpkin.
- Roasted Pumpkin: Cut your pumpkin into wedges or cubes, drizzle with olive oil, and roast in the oven for a savory side dish.
- Pumpkin Soup: Blend cooked pumpkin with broth, onions, garlic, and spices to create a creamy, comforting soup.
- Pumpkin Seeds: Don’t forget about the seeds! Roast pumpkin seeds with a sprinkle of salt or your favorite seasonings for a crunchy, healthy snack.
3. Composting
If you have any pumpkins that are damaged or starting to rot, they can be added to your compost pile. Pumpkins break down quickly and add valuable nutrients to the compost, which you can use to enrich your soil for next year’s garden.
Conclusion
Harvesting pumpkins is one of the most rewarding tasks for gardeners, especially as the fall season rolls in. By following the steps outlined in this guide, you’ll be able to harvest your pumpkins at just the right time, ensuring they’re ripe, flavorful, and ready for storage or cooking. From picking them at the perfect stage of ripeness to curing and storing them properly, the secrets to a successful pumpkin harvest are now at your fingertips. Happy harvesting!


