How to Prepare a Vegetable Seed Bed
If you’ve ever tried your hand at gardening, you know that the foundation of a successful harvest starts long before the seeds are sown. Preparing a vegetable seed bed might seem like a simple task, but it’s often overlooked or rushed. Without proper preparation, your seedlings may struggle to thrive, leading to disappointing results and wasted effort.
The good news is that by dedicating a little time and attention to preparing your seed bed correctly, you can create an environment that fosters healthy growth and maximizes your harvest. Whether you’re a seasoned gardener or a novice just starting out, understanding the essential steps in this process can make all the difference.
In this guide, we’ll walk you through the critical steps to prepare a vegetable seed bed, from selecting the right location and soil amendments to ensuring optimal moisture and drainage. By following these tips, you’ll set the stage for vibrant, flourishing plants that yield a bountiful crop.
Selecting the Right Location
1. Sunlight Requirements
Sunlight is a critical factor for plant growth. Most vegetables require at least 6-8 hours of direct sunlight each day to thrive. Plants like tomatoes, peppers, and squash benefit from full sun, while leafy greens like lettuce and spinach can tolerate partial shade.
When selecting a location, observe how sunlight moves across your garden throughout the day. Look for areas that receive ample sunlight and consider the height of nearby trees or buildings that might cast shadows.
2. Accessibility and Drainage
Good drainage is vital for preventing root rot and promoting healthy plant growth. Poorly drained soil can lead to waterlogged conditions, which can suffocate plant roots and promote disease.
To assess drainage, you can perform a simple test:
- Dig a Hole: Dig a hole about 12 inches deep and 12 inches wide.
- Fill with Water: Fill the hole with water and allow it to drain completely.
- Check the Drainage Rate: After 24 hours, fill the hole again. If it drains within 2-4 hours, you have good drainage. If it takes longer, you may need to consider amending the soil or choosing a different location.
Soil Preparation
1. Assessing Soil Quality
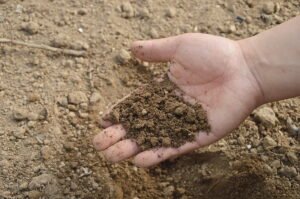
Before planting, it’s crucial to understand your soil’s health. Soil quality affects nutrient availability, pH levels, and microbial activity, all of which are essential for healthy plant growth.
- Soil pH: Most vegetables thrive in a slightly acidic to neutral pH range (6.0 to 7.0). You can purchase a soil pH test kit from a gardening center or send a soil sample to a laboratory for analysis. If your soil is too acidic or alkaline, you can amend it with lime or sulfur to adjust the pH.
- Nutrient Levels: A comprehensive soil test will also reveal the nutrient composition of your soil, including nitrogen, phosphorus, potassium, and micronutrients. This information will guide you in selecting the right fertilizers.
2. Amending the Soil
Once you understand your soil quality, it’s time to improve it. Amending the soil enhances its fertility and structure, creating a better environment for seed germination and root development.
- Organic Matter: Incorporate well-rotted manure, compost, or leaf mold into the soil. These materials enrich the soil with nutrients, improve moisture retention, and encourage beneficial microbial activity.
- Fertilizers: Based on your soil test results, you may need to add specific fertilizers. For instance, if your soil is low in phosphorus, consider using bone meal or rock phosphate. For potassium, wood ash or potash can be beneficial.
3. Tilling and Loosening the Soil
Tilling the soil helps to aerate it and breaks up any compacted layers that might impede root growth.
- When to Till: The best time to till is in the spring before planting or in the fall after harvesting. Tilling in the fall allows organic matter to break down over winter, enriching the soil for the next planting season.
- How to Till: Use a garden fork, rototiller, or hoe to loosen the top 12-15 inches of soil. Be cautious not to till too deeply, as this can disrupt the soil structure and kill beneficial organisms.
Creating the Seed Bed
1. Leveling the Surface
After tilling, it’s essential to create a level seed bed. An uneven surface can lead to pooling water, uneven seed distribution, and inconsistent germination.
- How to Level: Use a rake to spread soil evenly across the bed. Remove any large clumps of soil or debris, and use your hands to break up any remaining clods.
2. Forming Rows or Beds
The layout of your seed bed can significantly impact growth and harvest.
- Raised Beds vs. Traditional Rows: Raised beds offer improved drainage, warmer soil temperatures, and easier access for maintenance. They can be especially beneficial in regions with heavy clay soils. Traditional rows are suitable for larger areas but may require more careful management of drainage and weed control.
- Spacing Considerations: Depending on the type of vegetables you’re planting, be sure to allow adequate spacing between rows to enable proper air circulation and sunlight penetration. Generally, 18-24 inches between rows is recommended, while smaller plants like radishes and lettuce can be spaced closer together.
Watering Techniques
1. Importance of Moisture
Consistent moisture is crucial for seed germination and early plant growth. If the seed bed is too dry, seeds may fail to sprout; if it’s too wet, they may rot.
2. Methods for Watering the Seed Bed
- Drip Irrigation: This method delivers water directly to the roots, reducing evaporation and minimizing fungal diseases associated with overhead watering. It’s especially beneficial for larger gardens.
- Soaker Hoses: These hoses allow water to seep through the material, providing a gentle watering method ideal for seed beds.
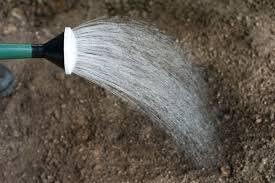
- Hand Watering: If you’re working with a small garden, using a watering can or hose with a spray nozzle can be effective. Water in the early morning or late afternoon to minimize evaporation.
Planting the Seeds
1. Choosing the Right Seeds
Selecting quality seeds is crucial for a successful garden. Choose seeds that are appropriate for your climate zone and the growing conditions of your seed bed.
- Consider Heirloom vs. Hybrid: Heirloom seeds offer a diverse range of flavors and resilience, while hybrids often provide disease resistance and higher yields.
2. Depth and Spacing Guidelines
Each type of vegetable has specific planting depth and spacing requirements:
- General Guidelines:
- Seeds like carrots and radishes should be planted about 1/4 to 1/2 inch deep.
- Larger seeds like beans and peas should be planted about 1-2 inches deep.
- Spacing: Consult seed packets for specific spacing recommendations. As a rule of thumb, larger plants like tomatoes and peppers need more space (about 24-36 inches apart), while smaller crops like lettuce can be spaced closer (about 6-12 inches apart).
3. Covering Seeds
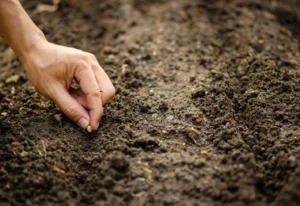
Once planted, lightly cover the seeds with soil and gently firm the surface. This step ensures good seed-to-soil contact, which is essential for germination.
Post-Planting Care
1. Mulching for Moisture Retention
Applying mulch around your seedlings can help retain soil moisture, suppress weeds, and regulate soil temperature.
- Recommended Materials: Organic materials like straw, wood chips, or shredded leaves are excellent options. Aim for a layer of about 2-3 inches around the base of the plants.
2. Monitoring Growth and Conditions
Regular monitoring is essential to catch any issues early. Check the soil moisture regularly and adjust your watering schedule based on weather conditions.
- Temperature Considerations: Use row covers during unexpected cold snaps or heat waves to protect young seedlings.
3. Pest and Weed Management
Early identification of pests and weeds can save your garden from significant damage.
- Pest Management: Familiarize yourself with common pests in your area and consider using organic pesticides or natural deterrents like neem oil or insecticidal soap.
- Weed Control: Hand-pulling or using a hoe to remove weeds is most effective when they are small. Mulching also helps suppress weed growth.
Troubleshooting Common Issues
1. Poor Germination Rates
If seeds fail to germinate, several factors could be at play:
- Soil Temperature: Most seeds have optimal germination temperatures. For example, warm-season crops like tomatoes prefer soil temperatures above 60°F (15°C).
- Moisture Levels: Ensure the seed bed is consistently moist but not waterlogged.
- Quality of Seeds: Always check the expiration date and storage conditions of your seeds before planting.
2. Soil Compaction and Drainage Problems
Compacted soil can impede root growth and water movement.
- Solutions: If you notice signs of compaction, consider aerating the soil or adding organic matter to improve soil structure. Avoid walking on the seed bed when it’s wet.
3. Nutrient Deficiencies
Signs of nutrient deficiencies can manifest as yellowing leaves, stunted growth, or poor yields.
- How to Address: Use balanced fertilizers or specific amendments to replenish nutrient levels based on your soil test results. Quick fixes like liquid fertilizers can provide an immediate boost.
Short Summary
Preparing a vegetable seed bed is a crucial step in ensuring a successful garden. By following the tips outlined in this guide—selecting the right location, amending the soil, and providing proper care—you set the foundation for healthy, thriving plants that will reward you with a bountiful harvest.
Gardening is a journey of experimentation, so don’t hesitate to try new techniques and observe the results. Each season brings its own challenges and rewards, and by learning from your experiences, you’ll become a more skilled gardener over time.


