How to Grow Hydrangeas Successfully | A Complete Guide for Beginners
Hydrangeas are among the most beloved garden plants, known for their vibrant and voluminous blooms. Whether you’re looking to add a splash of color to your garden or want a low-maintenance flowering shrub, hydrangeas can meet your needs. Their versatile beauty, easy care, and the ability to adjust flower colors based on soil pH make them a favorite among beginner and experienced gardeners alike. If you’re new to gardening or have been hesitant about growing hydrangeas, don’t worry! This comprehensive guide will walk you through everything you need to know to grow hydrangeas successfully.
Understanding Hydrangeas: Types and Varieties
Hydrangeas come in several types, each offering unique characteristics. Knowing which variety suits your climate and garden space is the first step toward growing healthy hydrangeas. Let’s explore some of the most common varieties:
- Bigleaf Hydrangeas (Hydrangea macrophylla): These are the most popular hydrangea variety. They are known for their large, rounded flower clusters and the ability to change color based on the soil’s pH. Acidic soil will yield blue flowers, while alkaline soil will turn them pink. They thrive in zones 5-9 and prefer partial shade.
- Panicle Hydrangeas (Hydrangea paniculata): Known for their cone-shaped flower clusters, panicle hydrangeas are hardier and more tolerant of full sun than other varieties. They bloom in late summer and can range from white to pinkish hues. These are ideal for zones 3-8 and are great for colder climates.
- Smooth Hydrangeas (Hydrangea arborescens): Also called wild hydrangeas, these are easy to grow and produce large, white or greenish-white flower heads. Smooth hydrangeas are perfect for zones 3-9 and bloom consistently throughout the summer.
- Oakleaf Hydrangeas (Hydrangea quercifolia): Named for their distinctive oak-shaped leaves, these hydrangeas are known for their foliage, which turns red or purple in the fall. Their large, white flower clusters can turn pink as they age. Oakleaf hydrangeas thrive in zones 5-9 and are a great choice for shaded areas.
Choosing the Right Hydrangea Variety
When selecting a hydrangea variety, consider your local climate, available sunlight, and the overall aesthetic you’re aiming for. Bigleaf hydrangeas are perfect for those who want to experiment with flower color, while panicle hydrangeas are great for full-sun gardens.
Choosing the Right Location for Hydrangeas
Location is key to the success of growing hydrangeas. While hydrangeas are relatively easy to care for, their growth and bloom quality depend on getting the right amount of sunlight, water, and space.
- Sunlight Needs: Hydrangeas generally prefer partial shade, especially in hotter climates. Most varieties do best with morning sun and afternoon shade to protect them from the harshest heat of the day. Panicle hydrangeas, however, can tolerate more sun than other types.
- Soil Requirements: Hydrangeas thrive in well-draining, moist but not waterlogged soil. The pH of the soil can affect the color of the flowers in some varieties, particularly Bigleaf Hydrangeas. If you want blue blooms, make sure the soil is acidic (pH of 5.5 or lower). For pink blooms, the soil should be more alkaline (pH of 6.5 or higher).
- Planting Space: Hydrangeas need plenty of space to grow. Depending on the variety, they can spread out quite a bit. When planting multiple hydrangeas, leave about 3 to 10 feet of space between them to allow for proper air circulation and room to grow.
How to Plant Hydrangeas: Step-by-Step Guide
1. When to Plant:
The best time to plant hydrangeas is in the spring or fall when temperatures are cooler, and the plants have time to establish themselves before the extreme heat or cold.
2. Preparing the Soil:
Before planting, test your soil’s pH level if you want to control the color of Bigleaf Hydrangeas. If the soil is too dense, mix in compost or organic matter to improve drainage.
3. Planting Process:
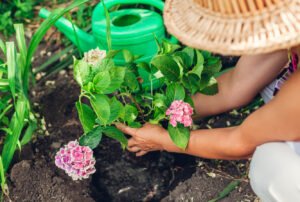
- Digging the Hole: Dig a hole that is twice as wide and about the same depth as the root ball of your hydrangea plant.
- Positioning the Plant: Place the plant in the hole, ensuring that the top of the root ball is level with the ground surface.
- Filling the Hole: Fill the hole halfway with soil, then water it thoroughly to help settle the roots. Finish filling the hole and water again to remove any air pockets.
- Mulching: Apply a layer of mulch around the base to retain moisture and regulate soil temperature.
Caring for Hydrangeas: Watering, Feeding, and Mulching
1. Watering:
Hydrangeas need consistent moisture, especially during their growing season. Water deeply 1-2 times per week, ensuring the soil remains moist but not soggy. The amount of water required may increase in hotter climates.
2. Feeding (Fertilizing):
Hydrangeas benefit from fertilization during their growing season:
- In spring, apply a balanced fertilizer (10-10-10) to promote growth.
- During the summer, you can switch to a phosphorus-rich fertilizer (to encourage more blooms).
- Avoid over-fertilizing, as this can lead to more foliage than flowers.
3. Mulching:
Applying 2-3 inches of mulch around the base of the hydrangea helps conserve moisture, regulate soil temperature, and suppress weeds. Organic mulch like bark or compost is ideal.
Pruning Hydrangeas: Tips for Healthy Growth
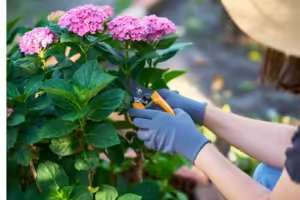
Pruning is essential for maintaining the health and appearance of hydrangeas. However, different types of hydrangeas require different pruning methods:
1. Bigleaf and Oakleaf Hydrangeas:
These hydrangeas bloom on old wood (the previous year’s growth), so prune them after flowering, typically in late summer or early fall. Be careful not to prune too much, as you may remove next year’s blooms.
2. Panicle and Smooth Hydrangeas:
These varieties bloom on new wood, meaning they can be pruned in late winter or early spring before new growth begins. Prune them back to encourage new growth and larger blooms.
3. Deadheading:
For all hydrangea types, deadheading (removing spent blooms) can encourage more blooms and improve the plant’s appearance.
Common Problems and Solutions: Troubleshooting Hydrangeas
Even with proper care, hydrangeas can sometimes encounter problems. Here are some common issues and how to solve them:
1. Pests and Diseases:
- Powdery Mildew: This fungal disease appears as a white powder on leaves. Ensure proper air circulation and apply a fungicide if needed.
- Aphids and Spider Mites: These pests can be treated with insecticidal soap or a strong blast of water.
- Leaf Spots: Often caused by fungal or bacterial infections. Remove affected leaves and improve air circulation.
2. Yellowing Leaves:
This could be a sign of overwatering, nutrient deficiency, or poor drainage. Test the soil and adjust watering practices accordingly.
3. Frost Damage:
In colder regions, protect hydrangeas from frost by applying mulch around the base and covering them with burlap or frost cloth during cold spells.
How to Change Hydrangea Flower Color
One of the most exciting aspects of growing Bigleaf Hydrangeas is the ability to change the flower color. The color depends on the pH of the soil:
- For Blue Flowers: The soil must be acidic (pH 5.5 or lower). You can lower the pH by adding aluminum sulfate or organic materials like pine needles or coffee grounds.
- For Pink Flowers: The soil must be alkaline (pH 6.5 or higher). You can raise the pH by adding garden lime to the soil.
Changing the pH takes time, so be patient and monitor the soil regularly.
Hydrangeas in Containers: Growing Tips for Small Spaces
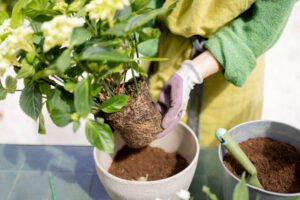
Hydrangeas can thrive in containers if you don’t have garden space. Here’s how to ensure success:
- Choosing the Right Pot: Use a large container (at least 18-24 inches in diameter) with drainage holes.
- Soil: Use well-draining potting mix rich in organic matter.
- Watering: Container plants dry out faster, so water more frequently, especially in hot weather.
- Fertilization: Feed container hydrangeas with a balanced liquid fertilizer every 4-6 weeks during the growing season.
Overwintering Hydrangeas: How to Protect Them During Winter
Some hydrangea varieties are more cold-hardy than others, but all hydrangeas benefit from winter protection in colder climates.
- Mulching: Apply a thick layer of mulch around the base to protect the roots from freezing temperatures.
- Covering: For added protection, cover the plants with burlap or frost cloth to shield them from harsh winds and frost.
- Spring Uncovering: Once the threat of frost has passed, remove any coverings and prepare for new growth.
Short Summary
Growing hydrangeas successfully is all about understanding their unique needs and providing the right care. By choosing the right variety, planting in the right location, and following proper care guidelines, you can enjoy vibrant and beautiful hydrangea blooms year after year. Whether you’re a beginner or an experienced gardener, hydrangeas are a rewarding addition to any garden. With their stunning flowers and the ability to change colors, hydrangeas offer both beauty and intrigue, making them a must-have for any garden.


