Step-by-Step Guide: How to Grow a Stunning Rubber Plant at Home
Are you frustrated with your indoor plants not thriving as they should? Many plant enthusiasts struggle to keep their greenery healthy, particularly with popular choices like the rubber plant. But here’s the good news: growing a rubber plant indoors is not only possible but also incredibly rewarding! With its beautiful, glossy leaves and forgiving nature, the rubber plant can become a stunning focal point in your home. In this step-by-step guide, we’ll explore everything you need to know about growing a rubber plant, from selecting the perfect location and pot to understanding its watering needs and troubleshooting common issues. Let’s embark on this journey to cultivate your very own lush rubber plant!
Understanding Rubber Plants
A. Origin and Characteristics
The rubber plant, scientifically known as Ficus elastica, is native to the tropical regions of Southeast Asia, particularly in countries like India, Indonesia, and Malaysia. It thrives in warm, humid environments, typically found in rainforests where it can reach heights of up to 100 feet in the wild. In indoor settings, however, rubber plants usually grow to be about 6 to 10 feet tall, depending on their care and pot size.
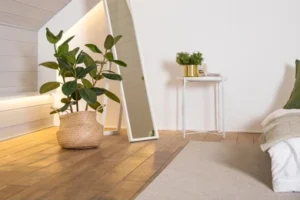
Rubber plants are distinguished by their large, glossy leaves, which can vary in color from deep green to burgundy or variegated patterns with cream or white edges. The plant’s leaves can grow up to a foot long, providing a striking aesthetic that enhances any indoor space.
B. Benefits of Having Rubber Plants Indoors

Air Purification: One of the most significant benefits of having rubber plants in your home is their ability to purify the air. Rubber plants are known to absorb toxins such as formaldehyde, benzene, and xylene, improving indoor air quality. Studies have shown that indoor plants can help reduce levels of pollutants, creating a healthier living environment.
Aesthetic Appeal: With their lush foliage and striking appearance, rubber plants make an excellent addition to any room. They can complement various decor styles, from modern to traditional, making them a versatile choice for indoor gardening.
Low Maintenance: For those new to plant care, rubber plants are relatively easy to grow. They require minimal attention compared to other houseplants, making them an excellent option for busy individuals or beginners.
Choosing the Right Rubber Plant
A. Selecting Healthy Plants
When selecting a rubber plant, it’s essential to choose a healthy specimen. Here are some tips on what to look for:
Healthy Leaves: Inspect the leaves for signs of damage or disease. They should be firm, glossy, and free from brown spots or yellowing. Avoid plants with droopy or wilting leaves, as this may indicate poor health.
Root Health: If possible, check the root system. Healthy roots should be white or light tan and firm to the touch. Avoid plants with mushy, dark roots, which can be a sign of root rot.
Size and Growth Stage: Consider the size of the plant and its growth stage. Younger plants are easier to handle and adapt to new environments, while mature plants may be more challenging to acclimate.
B. Best Places to Purchase
You can find rubber plants at local nurseries, garden centers, or reputable online retailers. Local nurseries often provide a better selection of healthy plants, and the staff can offer valuable advice on care. When purchasing online, read reviews and choose a seller known for quality plants.
Optimal Growing Conditions
A. Light Requirements
Rubber plants thrive in bright, indirect light but can adapt to lower light conditions as well. However, the amount of light directly affects their growth:
Ideal Light Conditions: Aim for a spot that receives bright, filtered sunlight, such as near a north or east-facing window. If your rubber plant is in a south or west-facing window, use sheer curtains to diffuse the light.
Signs of Too Much or Too Little Light:
- Too Much Light: If the leaves develop brown edges or spots, your plant may be getting too much direct sunlight. Move it to a location with filtered light.
- Too Little Light: If the plant becomes leggy, with long stems and small leaves, it’s a sign that it’s not receiving enough light. Move it closer to a light source to encourage bushier growth.
B. Temperature and Humidity Needs
Optimal Temperature Range: Rubber plants prefer a warm environment, thriving at temperatures between 65°F to 80°F (18°C to 27°C). Avoid exposing your plant to temperatures below 50°F (10°C), as cold drafts can harm it.
Humidity Preferences: These plants love humidity and will flourish in environments with a humidity level of around 40% to 60%. If you live in a dry climate, consider using a humidifier or placing the rubber plant on a pebble tray filled with water to increase humidity levels.
C. Soil and Potting
Best Soil Mix for Rubber Plants: A well-draining potting mix is crucial for healthy growth. You can create a suitable blend using equal parts potting soil, perlite, and peat moss. This mix retains moisture while allowing excess water to drain away.
Choosing the Right Pot: Select a pot with drainage holes to prevent water from accumulating at the bottom. Terracotta pots are an excellent choice as they allow for better airflow to the roots. As your rubber plant grows, be prepared to repot it into a larger container to accommodate its expanding root system.
Watering and Feeding
A. Watering Guidelines
Frequency: Rubber plants prefer to dry out between waterings. Check the top inch of the soil; if it feels dry, it’s time to water. Depending on your home’s humidity and temperature, this may be every 1 to 2 weeks.
Signs of Overwatering and Underwatering:
- Overwatering: Yellowing leaves, a mushy stem, and root rot are signs of overwatering. Ensure your pot has good drainage and reduce watering frequency.
- Underwatering: If the leaves are curling or browning, your rubber plant may need more water. Water thoroughly, allowing excess water to drain from the bottom.
B. Fertilizing Your Rubber Plant
Recommended Fertilizers: Use a balanced, water-soluble fertilizer with an N-P-K ratio of 20-20-20 during the growing season (spring and summer). Dilute the fertilizer to half strength to avoid burning the roots.
Feeding Schedule: Fertilize your rubber plant every 4 to 6 weeks during the growing season. In fall and winter, reduce feeding as the plant enters a dormant phase.
Common Care Tips
A. Pruning and Grooming
How and When to Prune: Regular pruning helps maintain the plant’s shape and promotes bushier growth. Remove any yellow or damaged leaves by cutting them at the base. Prune in spring to encourage new growth.
Managing Leaf Health: Clean the leaves regularly by wiping them with a damp cloth to remove dust and keep them looking glossy. This practice also allows the plant to photosynthesize more effectively.
B. Pest and Disease Management
Common Pests: Rubber plants can be susceptible to pests such as spider mites, aphids, and mealybugs. Regularly inspect the leaves for any signs of infestation.
Preventive Measures: To prevent pests, maintain proper care and humidity levels. If you notice pests, treat them promptly with insecticidal soap or neem oil. Ensure that you follow the manufacturer’s instructions for safe and effective use.
Propagation Techniques
A. Methods for Propagating Rubber Plants
Stem Cuttings: The easiest way to propagate rubber plants is through stem cuttings. Take a healthy cutting that is at least 4-6 inches long, ensuring it has several leaves. Remove the lower leaves and place the cutting in a glass of water or directly in soil.
Air Layering: For a more advanced method, consider air layering. This involves making a small incision on the stem, applying rooting hormone, and wrapping it in moist sphagnum moss. Once roots develop, cut the stem below the rooted section and transplant it into soil.
B. Tips for Successful Propagation
- Use clean, sharp scissors or a knife to take cuttings to prevent infection.
- Keep the cuttings in a warm, bright area but out of direct sunlight.
- Change the water every few days during water propagation to keep it fresh.
Troubleshooting Common Issues

A. Yellowing Leaves
If your rubber plant’s leaves are turning yellow, it could be due to overwatering, underwatering, or inadequate light. Assess your care routine—check the soil moisture, adjust watering frequency, and ensure the plant is receiving the right amount of light.
B. Leaf Drop
Leaf drop can be concerning but is often a response to environmental stress. Changes in temperature, humidity, or light levels can cause this issue. Make sure to keep the plant in a stable environment and monitor any changes.
C. Stunted Growth
If your rubber plant isn’t growing as expected, it might need repotting or more nutrients. Check the root system; if it’s root-bound, consider moving it to a larger pot with fresh soil. Additionally, ensure that you’re fertilizing during the growing season.
D. Addressing Pests and Diseases
Regularly inspect your plant for pests, and treat infestations promptly. If you notice signs of disease, such as wilting or black spots, remove affected leaves and adjust your care routine. Sometimes, moving the plant to a different location can help it recover.
Short Summary
In conclusion, the rubber plant is an excellent choice for indoor gardening enthusiasts of all experience levels. With its striking foliage and relatively low maintenance needs, it can enhance any living space. By understanding its care requirements—light, water, temperature, and soil—you can cultivate a healthy, beautiful rubber plant that thrives in your home.
By following the steps outlined in this guide, you can ensure your rubber plant remains lush and vibrant. Don’t hesitate to experiment with propagation methods to expand your collection or share the joy of plant parenting with friends and family.
Whether you’re a novice or a seasoned plant enthusiast, the rubber plant will reward you with its stunning beauty and resilience. So go ahead, bring home this lovely plant, and enjoy the numerous benefits it offers. Happy gardening!


